
Sharing camera between OBS and Discord
This is a small guide that walks through setting up a virtual camera scene in OBS that will be transmitted to Discord (or other applications). The camera sent to Discord will contain your camera and any other items you want to include (such as your name, etc.), while OBS will continue to operate normally.
Pre-requisites
- Working OBS setup
- The Virtual Camera Filter (downloaded and installed) - not required in OBS 28+
Initial setup
The first step is to remove your camera from all your existing scenes.
Open OBS, and go through all your scenes (all items in 1, below) and make sure there are no sources (2, below) currently using your camera - remove your camera wherever it appears:
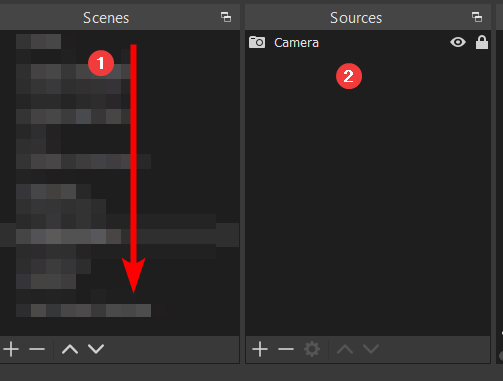
You should now have no camera input on any of your scenes in OBS.
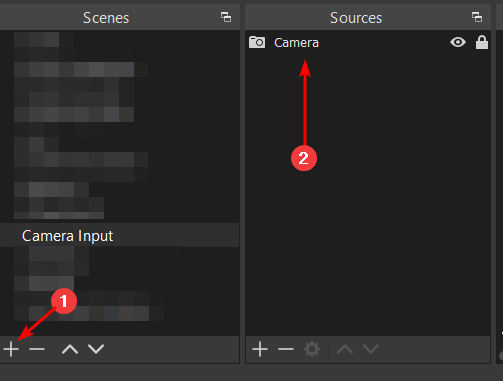
Add a new scene (1) and add your camera to it (2). Call this scene something like 'Camera Input'.
Adding your camera to other scenes
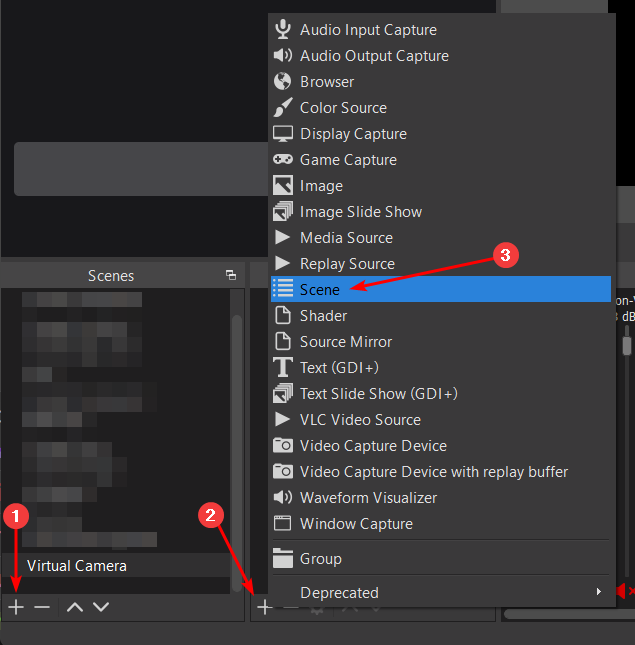
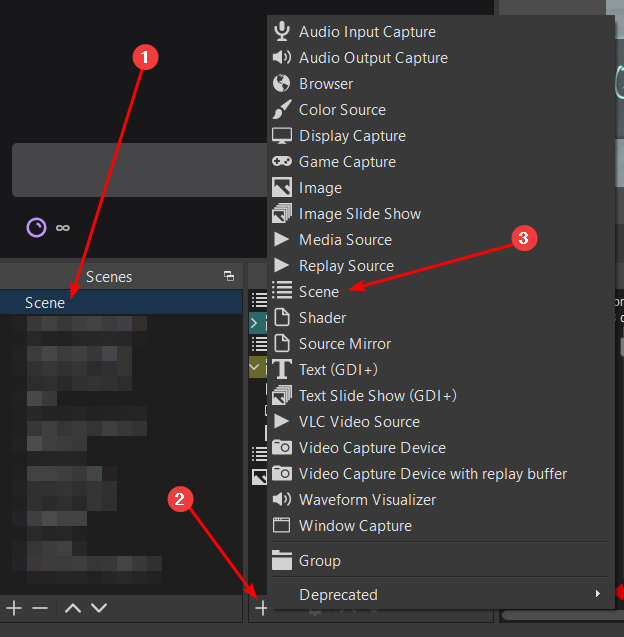
Create a new scene (1) called 'Virtual Camera', and add a source to it (2), and add a Scene source (3):
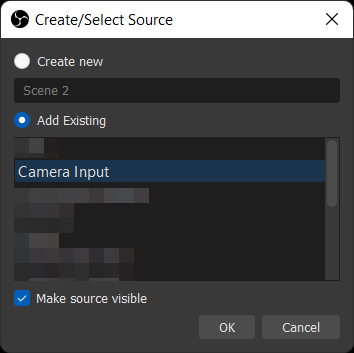
Choose 'Add Existing' and choose the Camera Input scene from above:
For older versions of OBS (prior to 28)
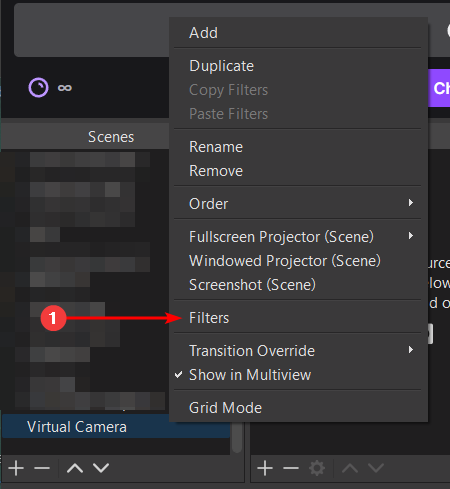
Right click on the Scene for 'Virtual Camera' and click on 'Filters' (1):
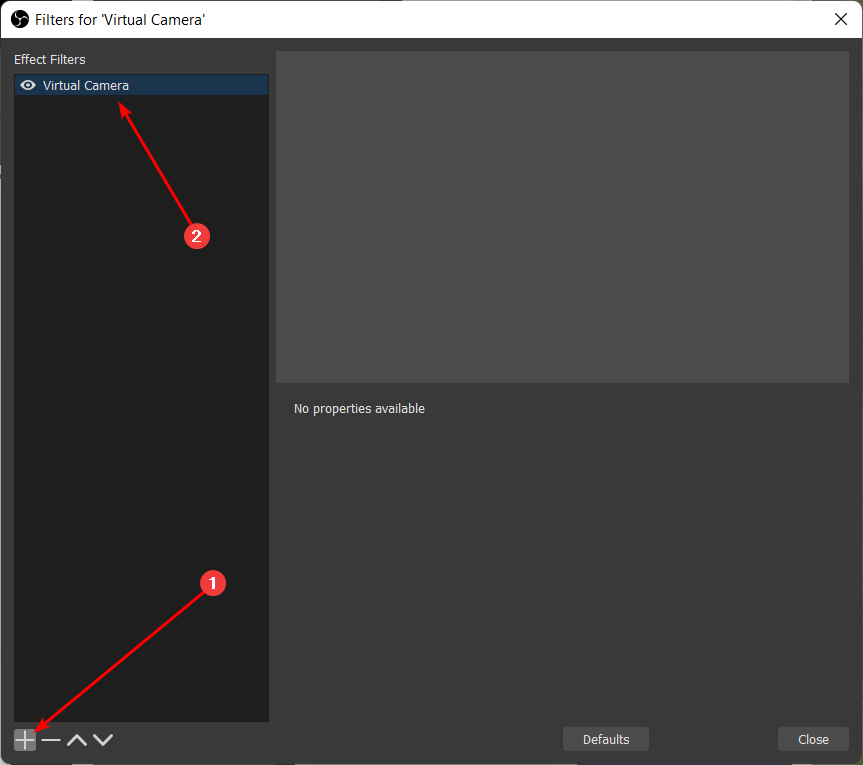
Click + (1) and add 'Virtual Camera'. Your filters should look like this:
Use your camera in Discord or other apps
At this point your scene 'Virtual Camera' is available to the rest of your system as OBS Virtual Camera.
You can add other things to your scene (i.e. your name, socials, etc.) to the 'Virtual Camera' scene - this will show up in Discord and other places you can use 'OBS Virtual Camera'.
Note: Do not click 'Start Virtual Camera' in the main OBS window. The virtual camera will always be on. If you need to turn off your virtual camera (such as to change OBS settings), return to the Virtual Camera filter list and click the eye icon next to Virtual Camera.
Adding your camera back to your scenes
At the beginning of this process, we removed the camera from all scenes. To add your camera back to your scenes, go through each scene where you want your camera. Instead of adding your camera input (your Video Capture Device), add the camera as you did in the Virtual Camera scene by adding the Camera as a Scene source.
Return to each of your scenes (1), add a source to it (2), and add a Scene source (3):
Choose 'Add Existing' and choose the Camera Input scene from above:
Finishing Up
You now should have your camera only in one scene ('Camera Input'), and you are now using that scene as a Source inside other scenes that need your camera.
You also have a Scene called 'Virtual Camera' that is transmitted to other applications via the 'OBS Virtual Camera'. You can adjust that scene as you wish to add other material (text sources, etc. as with any other OBS scene) and it will only appear on your camera feed, and not go to your stream.
For newer versions of OBS (after 28)
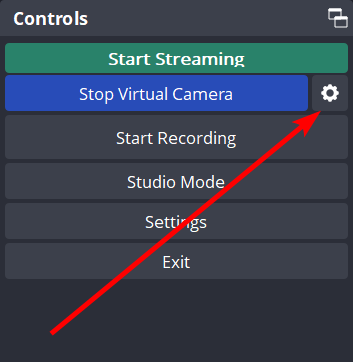
Click the cog next to the Virtual Camera link. And change your Output Type to 'Scene' and Output Selection to your 'Virtual Camera' scene.
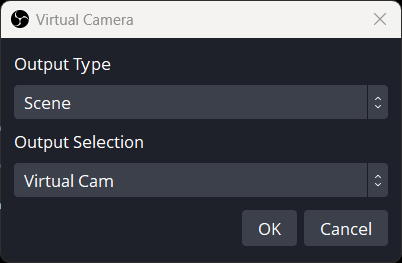
You will need to click 'Start Virtual Camera' to turn on the camera for other apps.
For older versions of OBS (prior to 28)
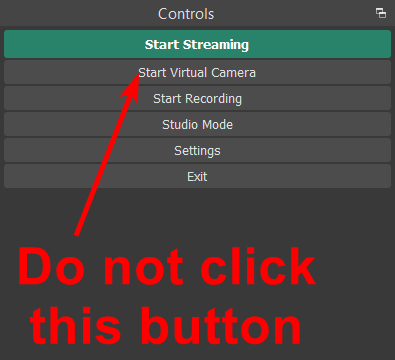
Note: Do not click 'Start Virtual Camera' in the main OBS window. The virtual camera will always be on. If you need to turn off your virtual camera (such as to change OBS settings), return to the Virtual Camera filter list and click the eye icon next to Virtual Camera.
No comments to display
No comments to display